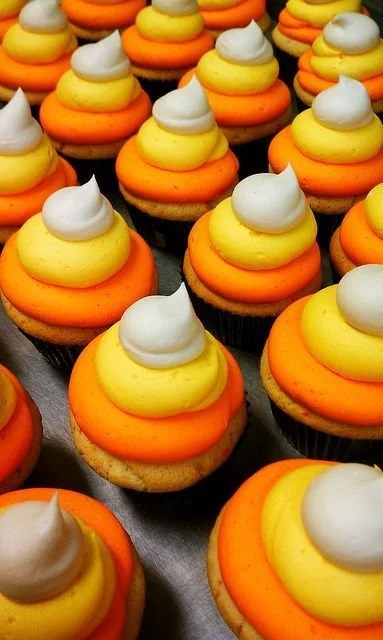
Chocolate-Coated Halloween Treats are perfect for adding a festive touch to your celebrations. This recipe combines cake pops, Oreos, and Twinkies dipped in delicious chocolate and decorated for Halloween fun. They’re easy to make and are sure to delight kids and adults alike at any Halloween gathering.
Why You’ll Love Chocolate-Coated Halloween Treats
- Easy and Fun Preparation: These treats are simple enough for beginner cooks, making them a great activity for families or parties.
- Customizable Design: You can decorate them however you like, letting your creativity shine. Halloween-themed decorations add extra flair to your treats.
- Perfect for Parties: These treats are eye-catching and delicious, making them perfect for Halloween parties, school functions, or family gatherings.
- Variety in Each Bite: With cake pops, Oreos, and Twinkies, you get a mix of textures and flavors, keeping each treat exciting.
- Make Ahead Option: You can prepare these treats in advance, saving time on the day of your event.
Recipe Overview
- Prep Time: 30 minutes
- Cook Time: 15 minutes
- Total Time: 45 minutes
- Servings: About 24 treats
- Difficulty Level: Easy
Ingredients You’ll Need for Chocolate-Coated Halloween Treats
-
For Cake Pops:
- Cake: Any flavor cake works; a box mix is perfectly fine for beginners.
- Frosting: Use store-bought or homemade frosting; it helps bind the crumbled cake.
-
For Oreo Cookies:
- Oreo Cookies: Regular or seasonal flavors work; look for any Halloween-themed varieties.
-
For Twinkies:
- Twinkies: Pre-packaged Twinkies save time and effort; they’re the ideal base for decorating.
-
For Coating:
- Chocolate: Use chocolate chips or candy melts, which are easier to work with for coating.
-
For Decoration:
- Candy Decorations: Look for Halloween-themed candies like candy eyes, sprinkles, or edible glitter.
- Food Coloring: Optional for creating colored drizzle or designs.
- Ghost or Pumpkin-Shaped Molds: Optional for shaping the chocolate or for added decoration.

here
How to Make Chocolate-Coated Halloween Treats
-
Bake and Cool the Cake:
- Prepare the cake as directed on the package. Let it cool completely before crumbling it into a large bowl.
-
Form Cake Balls:
- Mix in frosting until the mixture holds together. Roll this mix into balls about 1 inch in diameter. Place them on a baking sheet lined with parchment paper, then chill them in the refrigerator for at least 30 minutes.
-
Insert Sticks into Cake Pops:
- Once chilled, insert cake pop sticks into the center of each cake ball until halfway through. This will help stabilize them during coating.
-
Melt the Chocolate:
- In a microwave-safe bowl, melt the chocolate or candy melts according to package instructions. Stir until smooth.
-
Coat the Cake Pops:
- Dip each cake pop into the melted chocolate, ensuring it’s completely covered. Tap off any excess chocolate and let them set in a Styrofoam or a block of foam for support.
-
Decorate Oreos:
- Dip each Oreo in the melted chocolate, fully coating them. Use a fork to lift them out and shake off any excess. Before the chocolate hardens, add fun Halloween decorations or sprinkles.
-
Prepare Twinkies:
- Dip Twinkies into the melted chocolate similarly, allowing excess to drip off. Decorate using candy decorations, creating cute ghost or pumpkin shapes.
Tips for Success
- Chill the Cake Balls: This step is crucial as it helps prevent the cake pops from falling apart when dipped in chocolate.
- Use a Candy Melter: For easier work with chocolate, consider using a candy melter, which keeps the chocolate at the right temperature for dipping.
- Keep Drip Time in Mind: Allow the dipped treats to sit briefly before decorating to reduce mess.
- Test Decorations: Before coating all treats, practice with a few to get a feel for how much decorating you want to do.
Easy Variations
- Add Flavored Chocolate: Experiment with white chocolate or flavored melting wafers for variety in taste.
- Use Different Cake Flavors: Chocolate, vanilla, or even red velvet cake can provide a unique twist.
- Healthier Options: Substitute the frosting with yogurt or cream cheese for a lighter cake pop option.
- Seasonal Themes: Change decorations based on the season – use pink and red for Valentine’s or colors for other holidays.
What to Serve with Chocolate-Coated Halloween Treats
- Apple Slices: Crisp apple slices offer a fresh, sweet contrast to the rich treats.
- Caramel Sauce: Create a dipping station for added fun and flavor.
- Popcorn: Sweet or savory popcorn can complement these treats nicely.
- Spooky Punch: A fun drink adds a festive feel to your Halloween table.
Storage and Reheating
- Refrigerator Storage: Store leftover coated treats in an airtight container in the refrigerator for up to 5 days.
- Freezer Storage: Individually wrap each treat and freeze for up to a month. Thaw in the fridge before serving.
- Best Reheating Method: Avoid reheating these treats; enjoy them cold or at room temperature to maintain texture.
Common Mistakes to Avoid
- Overmixing Cake: When crumbling the cake, do not overmix as it can make it too dense.
- Not Chilling: Failing to chill the cake balls can lead to messy, falling-apart pops.
- Using Hot Chocolate: Make sure the chocolate for dipping is warm, not too hot, to prevent melting the cake pops.
Chocolate-Coated Halloween Treats: Background & Cultural Inspiration
Chocolate treats have long been a festive favorite, especially around Halloween. The tradition of making candy during this holiday dates back to ancient Celtic festivals, where people would share sweets as offerings to spirits. Today, these creative chocolate-coated bites add a modern twist to classic treats, bringing families together through activities of baking and decorating. Whether it’s decorating cake pops to resemble spooky characters or dipping Oreos and Twinkies, this recipe caters to the playful spirit of Halloween.
Frequently Asked Questions
Can I use gluten-free cake for the pops?
Yes, you can substitute regular cake with a gluten-free cake mix to make gluten-free cake pops.
How long do these treats stay fresh?
Stored properly in an airtight container, they will remain fresh for about 5 days in the refrigerator.
Can I make these treats ahead of time?
Absolutely! You can prepare and store them a day or two in advance to save time on the event day.
What can I use instead of frosting?
If you’re looking for a lighter option, cream cheese or yogurt can be effective alternatives for binding the cake.
How do I get smooth chocolate coatings?
Make sure the chocolate is fully melted and stirred until smooth. Dip quickly and gently tap to remove excess chocolate.
Final Thoughts
Chocolate-Coated Halloween Treats are a delightful addition to any Halloween celebration. They’re easy to prepare, fun to decorate, and sure to impress your family and friends. Try making these treats for your next gathering, and watch as everyone enjoys the festive flair and delicious flavors. It’s a perfect way to celebrate the season and share some sweets!
PrintChocolate-Coated Halloween Treats
Easy and fun chocolate-coated treats made with cake pops, Oreos, and Twinkies, perfect for Halloween celebrations.
- Prep Time: 30 minutes
- Cook Time: 15 minutes
- Total Time: 45 minutes
- Yield: 24 treats
- Category: Dessert
- Method: Dipping
- Cuisine: American
- Diet: Vegetarian
Ingredients
- 1 box cake mix (any flavor)
- 1 cup frosting (store-bought or homemade)
- 24 Oreo cookies (regular or seasonal)
- 24 Twinkies
- 2 cups chocolate chips or candy melts
- Halloween-themed candy decorations (candy eyes, sprinkles, edible glitter)
- Food coloring (optional)
- Ghost or pumpkin-shaped molds (optional)
Instructions
- Bake and cool the cake: Prepare the cake as directed on the package. Let it cool completely before crumbling it into a large bowl.
- Form cake balls: Mix in frosting until the mixture holds together. Roll this mix into balls about 1 inch in diameter. Place them on a baking sheet lined with parchment paper, then chill in the refrigerator for at least 30 minutes.
- Insert sticks into cake pops: Once chilled, insert cake pop sticks into the center of each cake ball until halfway through.
- Melt the chocolate: In a microwave-safe bowl, melt the chocolate or candy melts according to package instructions. Stir until smooth.
- Coat the cake pops: Dip each cake pop into the melted chocolate, ensuring it’s completely covered. Tap off any excess and let them set in a Styrofoam block for support.
- Decorate Oreos: Dip each Oreo in the melted chocolate, fully coating them. Use a fork to lift them out and shake off any excess. Before the chocolate hardens, add Halloween decorations or sprinkles.
- Prepare Twinkies: Dip Twinkies into the melted chocolate similarly, allowing excess to drip off. Decorate using candy decorations.
Notes
Chill the cake balls to prevent them from falling apart when dipped in chocolate. Use a candy melter for easier chocolate handling.












