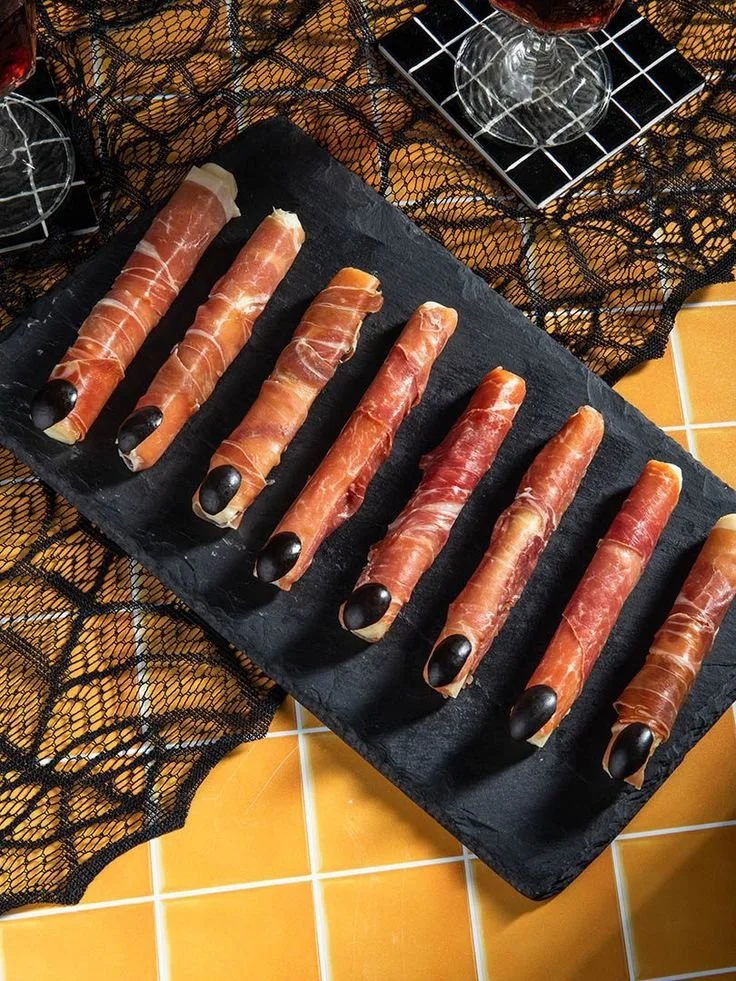
Witch Fingers are a delightfully spooky treat that adds a fun, eerie touch to Halloween festivities. These cleverly crafted cookies not only bring a sense of humor to your holiday spread but also provide a delightful crunch and sweetness that everyone will enjoy. With simple ingredients and easy preparation, making these creepy cookies is a fantastic way to entertain kids and adults alike.
Why You’ll Love Witch Fingers
- Spooky Fun: Perfect for Halloween gatherings, these cookies are sure to be a hit with guests of all ages, creating a playful and festive atmosphere.
- Easy to Make: With straightforward steps, even beginner bakers can successfully create these ghoulish treats.
- Customizable: You can adjust the look of the fingers to make them as creepy or fun as you like, ensuring they’re a unique addition to your holiday spread.
- Deliciously Buttery: The combination of butter and powdered sugar gives these cookies a tender, melt-in-your-mouth texture that contrasts perfectly with the crunch of the almond nails.
- Perfect for Kids: Involving children in the decorating process can make for a great family activity, letting their creativity shine while enjoying a tasty treat.
Recipe Overview
- Prep Time: 20 minutes
- Cook Time: 15-20 minutes
- Total Time: 40 minutes
- Servings: About 24 cookies
- Difficulty Level: Easy
Ingredients You’ll Need for Witch Fingers
- For the Cookie Dough:
- 1 cup unsalted butter, softened
- 1 cup powdered sugar
- 1 egg
- 1 teaspoon vanilla extract
- 2 3/4 cups all-purpose flour
- 1 teaspoon baking powder
- 1/2 teaspoon salt
- For Decoration:
- 1 cup sliced almonds (for fingernails)
- Green food coloring (optional for a touch of creepiness)
- Red gel icing (for blood)
here
How to Make Witch Fingers
- Preheat the Oven: Preheat your oven to 350°F (175°C) and line a baking sheet with parchment paper to prevent sticking.
- Cream the Butter and Sugar: In a large bowl, cream together the softened butter and powdered sugar until the mixture is smooth and fluffy. This will add air, making your cookies tender.
- Incorporate Wet Ingredients: Beat in the egg and vanilla extract until fully combined, ensuring a rich flavor and moisture in your dough.
- Mix Dry Ingredients: In another bowl, whisk together the flour, baking powder, and salt. This helps distribute the leavening evenly.
- Combine Mixtures: Gradually blend the dry ingredients into the butter mixture until a smooth dough forms. Be careful not to over-mix.
- Add Color: If desired, add a few drops of green food coloring to the dough and mix until evenly incorporated for a ghoulish green hue.
- Shape the Fingers: Shape the dough into finger shapes, roughly 3-4 inches long, and press an almond slice onto the tip of each one to create the appearance of a fingernail.
- Detail the Knuckles: Use a knife to gently create knuckle lines on each finger, which adds to the spooky effect.
- Bake: Place the fingers on your prepared baking sheet and bake for 15-20 minutes, or until lightly golden. Keep an eye on them, as baking times may vary.
- Decorate: Once cooled, use red gel icing to add ‘blood’ around the almond nails for a gory finish.
Tips for Success
- Butter Temperature: Ensure your butter is softened but not melted. It should be at room temperature for the best texture.
- Chill the Dough: If you’re having trouble shaping the fingers, chill the dough for 30 minutes. This will make it easier to handle.
- Watch the Baking Time: Check your cookies a minute or two early. They should be firm but not browned much.
- Cutting Detail: Use a sharp knife for making knuckle indentations to prevent the dough from squishing.
- Cool Completely: Make sure to allow the cookies to cool completely before decorating to ensure your icing doesn’t melt.
Easy Variations
- Chocolate Version: Substitute half of the all-purpose flour with cocoa powder for a chocolatey twist.
- Spooky Sprinkles: AddHalloween-themed sprinkles instead of the red icing for a less gruesome but still festive look.
- Flavor Twists: Incorporate 1 teaspoon of almond or mint extract for a flavor variation.
- Gluten-Free Options: Use a gluten-free flour blend to make these suitable for those with gluten sensitivities.
- Pecan Nails: Swap sliced almonds for pecans or walnuts for a different look and taste.
What to Serve with Witch Fingers
- Witch’s Brew Punch: This fun, colorful punch complements the spooky theme.
- Monster Cupcakes: Pair these cookies with cupcakes decorated like monsters for a cohesive Halloween dessert table.
- Cheese and Crackers: A savory option balances out the sweets and is easy for guests to snack on.
- Creepy Cheese Platter: Use cheeses with varying textures and colors, decorated with olives for eyeballs.
- Spooky Fruit Salad: Incorporate black grapes and orange melon for a Halloween-themed fruit medley.
Storage and Reheating
- Refrigerator Storage: Store any leftovers in an airtight container in the refrigerator for up to one week.
- Freezer Storage: Freeze the cookies in a single layer on a baking sheet. Once frozen, transfer them to a freezer bag for up to three months.
- Reheating: To preserve texture, reheat from frozen by letting them sit at room temperature for about 30 minutes before enjoying.
- Meal Prep Note: You can prepare the dough ahead of time; shape the cookies and freeze them before baking.
Common Mistakes to Avoid
- Overmixing the Dough: This can toughen the cookies. Mix just until everything is combined.
- Inconsistent Shapes: Try to make the fingers uniform in size for even baking.
- Not Enough Detail: Don’t skip the knuckle lines; they make a big difference in the final appearance.
- Skipping Cool Time: Decorating too soon can result in icing that melts and loses its shape.
- Using Cold Butter: Using butter that’s too cold can result in a crumbly dough that’s hard to shape.
Witch Fingers: Background & Cultural Inspiration
Witch Fingers are an iconic Halloween treat, often associated with spooky stories and films. The concept of making food look like abnormal or creepy things has long been a part of Halloween tradition, bringing humor and a playful scare to the festivities. This recipe is inspired by the abundance of witches in folklore, where their gnarled and long fingers evoke both fear and curiosity. The artistic presentation of these cookies encourages creativity and allows bakers of all ages to join in on the spooky fun.
Frequently Asked Questions
Can I make Witch Fingers in advance?
Yes! You can prepare the dough ahead of time and either bake them freshly or freeze the shaped fingers for later.
How do I store the cookies?
Keep them in an airtight container at room temperature for up to one week, or refrigerate for longer freshness.
Can I change the colors of the icing?
Absolutely! You can use different colored icing to match party themes or personal preferences.
Are there gluten-free options?
Yes, you can substitute all-purpose flour with a gluten-free blend to make them safe for gluten-sensitive individuals.
What can I use instead of almonds?
Other nuts like pecans can be used, or you can simply omit the “nail” for an almond-free version.
Final Thoughts
Making Witch Fingers is not only a fantastic way to celebrate Halloween but also a fun baking project with family and friends. With their eerie appearance and sweet flavor, they can be a highlight of your holiday gatherings. Whether you’re serving them at a party or enjoying them as a spooky treat at home, they are sure to bring smiles and laughter. Give this easy recipe a try, and create your own batch of ghoulishly delicious cookies!
PrintWitch Fingers

Spooky and delicious cookies shaped like gnarled fingers, perfect for Halloween festivities.
- Prep Time: 20 minutes
- Cook Time: 20 minutes
- Total Time: 40 minutes
- Yield: 24 cookies
- Category: Dessert
- Method: Baking
- Cuisine: American
- Diet: Vegetarian
Ingredients
- 1 cup unsalted butter, softened
- 1 cup powdered sugar
- 1 egg
- 1 teaspoon vanilla extract
- 2 3/4 cups all-purpose flour
- 1 teaspoon baking powder
- 1/2 teaspoon salt
- 1 cup sliced almonds (for fingernails)
- Green food coloring (optional)
- Red gel icing (for blood)
Instructions
- Preheat the oven to 350°F (175°C) and line a baking sheet with parchment paper.
- Cream together the softened butter and powdered sugar until smooth and fluffy.
- Beat in the egg and vanilla extract until fully combined.
- Whisk together the flour, baking powder, and salt in another bowl.
- Blend the dry ingredients into the butter mixture until a smooth dough forms.
- Add a few drops of green food coloring if desired, mixing until evenly incorporated.
- Shape the dough into finger shapes, roughly 3-4 inches long, and press an almond slice onto the tip of each one.
- Create knuckle lines on each finger using a knife.
- Bake for 15-20 minutes, or until lightly golden.
- Decorate with red gel icing around the almond nails once cooled.
Notes
Use softened butter and chill dough if needed to make shaping easier. Ensure cookies cool fully before decorating.












