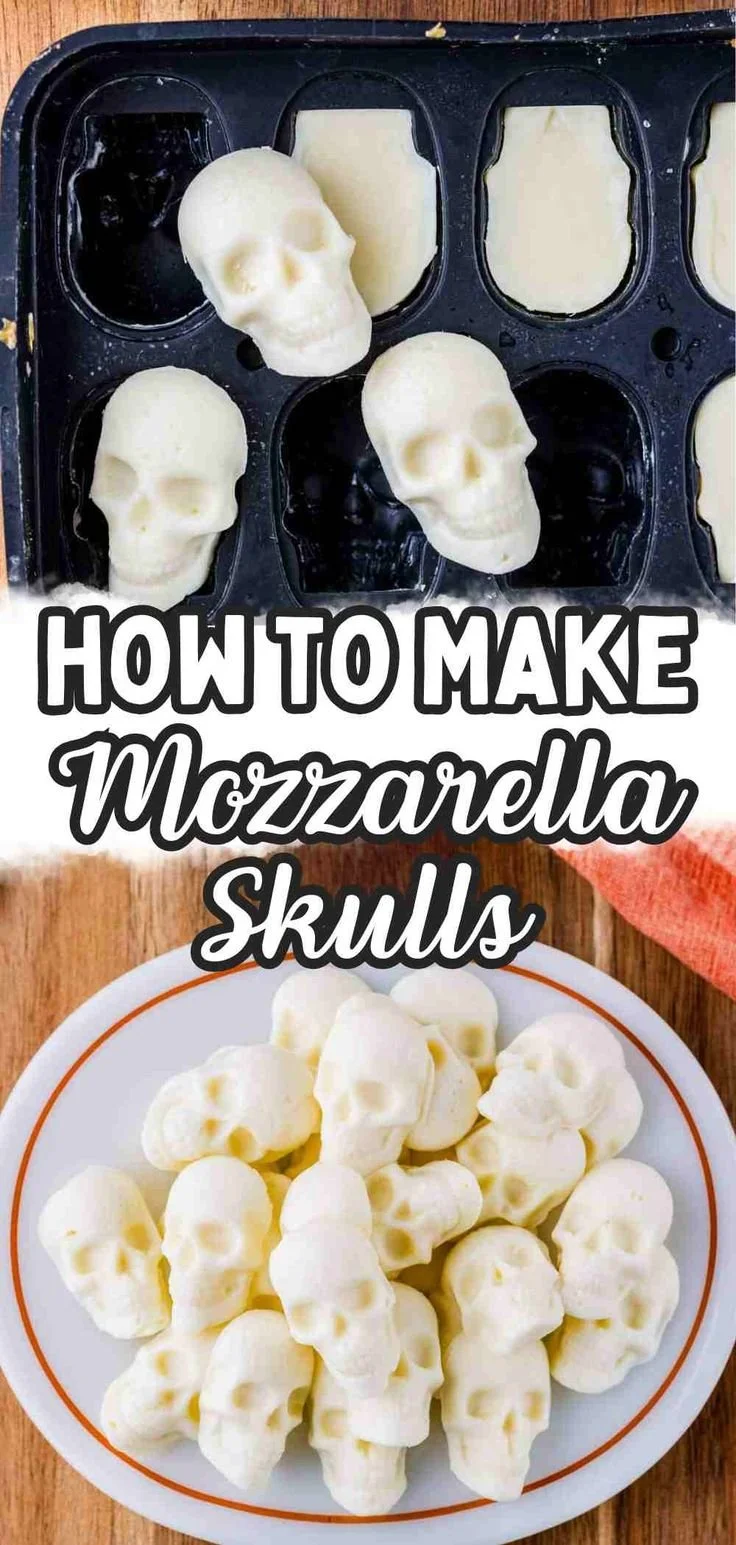
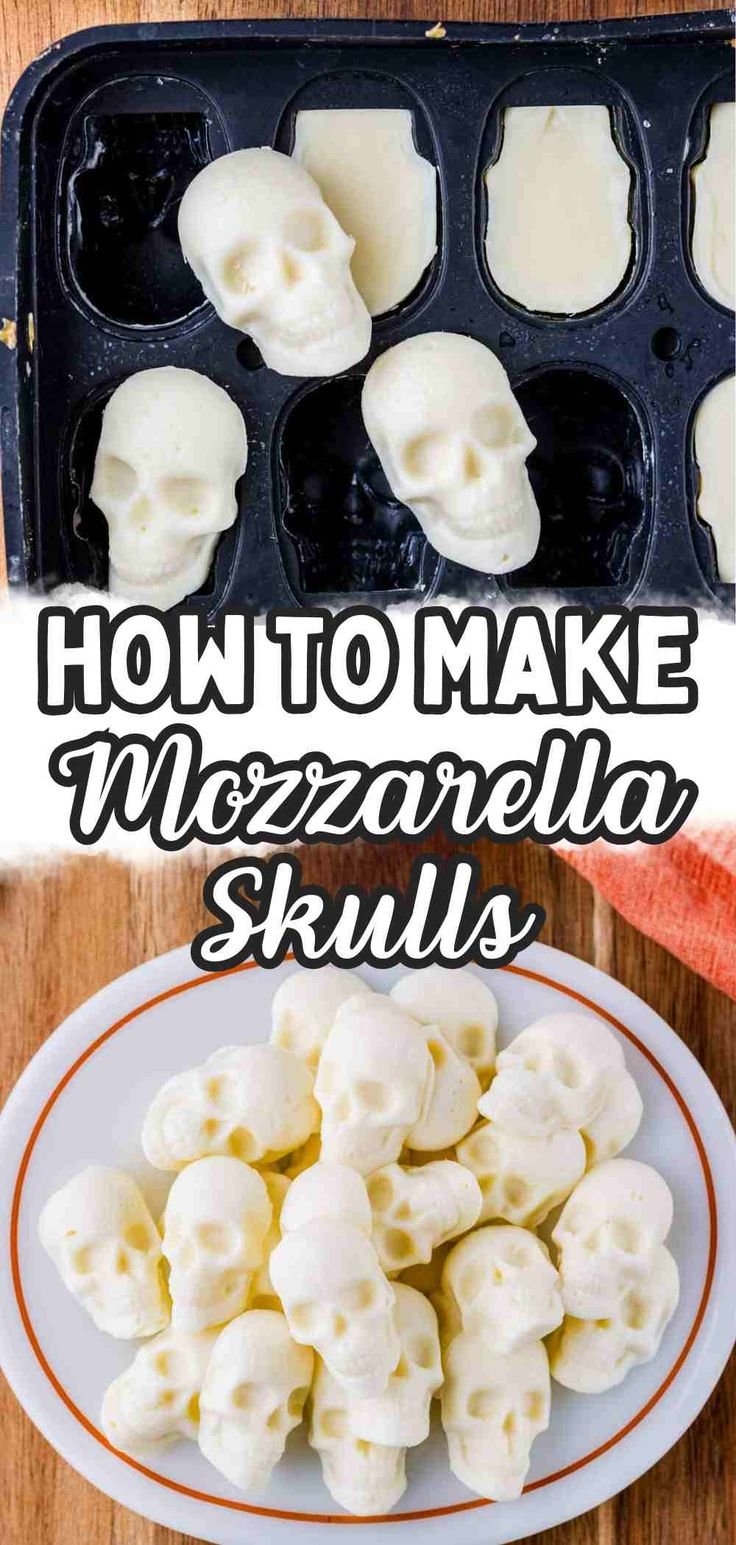
Halloween Mozzarella Skulls are a delightfully spooky treat that adds a playful flair to any charcuterie board or Halloween celebration. These creamy, cheese-skull creations are not only easy to make, but they also impress guests with their fun, festive design. Transforming simple mozzarella into scary (or cute!) skulls is a great way to engage everyone in the festivities and create an atmosphere of creativity.
Why You’ll Love Halloween Mozzarella Skulls
- Easy to Make: This recipe is straightforward enough for beginner cooks, requiring only a few simple steps and minimal equipment.
- Perfect for Halloween: These mozzarella skulls capture the spirit of the Halloween season, making them a unique addition to parties and gatherings.
- Customizable: You can easily personalize your skulls with various toppings or seasonings, allowing for creativity in your presentation.
- Fun for All Ages: Whether you’re having a children’s party or an adult gathering, everyone will enjoy these playful cheese shapes.
- Great Snack Option: Not only are they fun, but they also provide a tasty option for snacking that pairs wonderfully with various sides.
Recipe Overview
- Prep Time: 10 minutes
- Cook Time: 0 minutes (no cooking required)
- Total Time: 10 minutes
- Servings: 6
- Difficulty Level: Easy
Ingredients You’ll Need for Halloween Mozzarella Skulls
- Fresh mozzarella
- Silicone molds (skull-shaped)
- Olive oil (optional, for brushing)
- Salt (optional, for seasoning)
- Black olives (for decorating the eyes, optional)
here
Ingredient Notes
- Fresh Mozzarella: Look for mozzarella balls or blocks; the fresher, the better. You want a soft texture that holds shape well in the molds.
- Silicone Molds: Skull-shaped molds add a playful touch. Silicone allows for easy removal of the cheese without breaking.
- Olive Oil and Salt: These are optional but add depth of flavor. You can skip them if desired or use flavored olive oil for a fun twist.
- Black Olives: Use sliced black olives to create spooky eyes. They are easy to work with and visually striking against the white mozzarella.
How to Make Halloween Mozzarella Skulls
Step 1: Prepare Your Molds
Preheat your refrigerator to ensure a cold setting for the mozzarella skulls after molding.
Step 2: Cut the Mozzarella
Slice the fresh mozzarella into blocks or balls that fit snugly into your silicone molds.
Step 3: Mold the Cheese
Press the mozzarella into the skull molds, ensuring you fill them completely and create a defined shape.
Step 4: Season (Optional)
If desired, brush a light coating of olive oil over the mozzarella and sprinkle with salt to enhance the flavor.
Step 5: Add Olive Eyes
Place a small piece of black olive on each molded skull where the eyes should go. This simple step adds character and completes the spooky look.
Step 6: Chill to Set
Refrigerate the molds for about 30 minutes or until the mozzarella is firm to the touch.
Step 7: Unmold the Skulls
Carefully remove the mozzarella skulls from the molds. Silicone molds should allow for easy release.
Step 8: Serve & Enjoy
Arrange your Halloween Mozzarella Skulls on a charcuterie board or use them as toppings for salads. Enjoy the aesthetic and delightful flavors!
Tips for Success
- Use Fresh Mozzarella: Ensure your mozzarella is fresh for the best flavor and texture.
- Fill Molds Tightly: Press the cheese firmly into the molds to avoid misshapen skulls.
- Chill Adequately: Don’t skip the chilling step; it ensures the shapes hold well when you unmold them.
- Experiment with Flavors: Try different flavors of olive oil or toppings to customize your skulls to your liking.
Easy Variations
- Herbed Skulls: Incorporate dried herbs or seasoning blends into the mozzarella for added flavor.
- Colored Olive Eyes: Use green olives or other toppings to change the look and taste of your skulls.
- Stuffed Skulls: Fill the skull molds with small pieces of sun-dried tomatoes or basil before adding mozzarella for an extra layer of flavor.
- Cheese Blends: Combine mozzarella with another cheese, such as cheddar or pepper jack, for a unique flavor profile.
What to Serve with Halloween Mozzarella Skulls for Spooky Charcuterie Boards
- Crackers: The crispy texture of crackers complements the creamy mozzarella. Use an assortment of flavors.
- Cold Cuts: Prosciutto or salami adds a savory touch that pairs well with the mild mozzarella.
- Vegetable Sticks: Carrot and celery sticks provide a fresh crunch that balances the richness of the cheese.
- Fruit: Grapes or apple slices offer a sweet contrast to the savory skulls.
Storage and Reheating
- Refrigerator Storage: Store any leftover mozzarella skulls in an airtight container in the fridge. They are best consumed within 2-3 days.
- Freezer Storage: While fresh mozzarella can be frozen, it is best to consume skulls fresh for optimal texture. If necessary, freeze before shaping.
- Reheating: These are best served cold or at room temperature, so no reheating is necessary.
Common Mistakes to Avoid
- Skipping the Chill Time: Not chilling the molds can result in poorly shaped mozzarella.
- Overfilling the Molds: Pressing too much cheese into the molds can make them difficult to remove.
- Neglecting Ingredients: Leaving out the olive oil or seasoning may diminish the flavor of your mozzarella skulls.
Halloween Mozzarella Skulls: Background & Cultural Inspiration
Halloween is famous for its spooky imagery and playful traditions. Mozzarella Skulls tap into Halloween’s fun side while offering a unique culinary experience. The holiday encourages creativity in food presentation, making the act of shaping cheese into skulls a celebration of both the season and culinary art. Incorporating seasonal flavors and festive decorations enhances this experience, and these skulls encourage participation across age groups, creating memories around the table.
Frequently Asked Questions
Can I make Halloween Mozzarella Skulls ahead of time?
Absolutely! You can prepare these skulls a day in advance and store them in the refrigerator until ready to serve.
What can I use instead of mozzarella?
While mozzarella is best, you can experiment with other cheeses like provolone or feta for a different taste.
How long do Halloween Mozzarella Skulls last?
They are best consumed within 2-3 days of making for optimal freshness and taste.
Can I freeze mozzarella skulls?
Freezing is not recommended for these because the texture may change after thawing. It’s best to enjoy them fresh.
How do I make the skulls more flavorful?
Incorporate herbs or spices directly into the mozzarella or drizzle them with flavored oils before serving.
Final Thoughts
Making Halloween Mozzarella Skulls is not just about the tasty cheese—it’s an engaging way to celebrate the season and bring fun to your gatherings. With simple ingredients and easy steps, you can create an impressive dish that everyone will love. Try this festive treat at your next Halloween party for a snack that’s sure to be a hit!
PrintHalloween Mozzarella Skulls

Delightfully spooky mozzarella skulls that add a playful flair to any Halloween celebration or charcuterie board.
- Prep Time: 10 minutes
- Cook Time: 0 minutes
- Total Time: 10 minutes
- Yield: 6 servings
- Category: Snack
- Method: No cooking required
- Cuisine: American
- Diet: Vegetarian
Ingredients
- Fresh mozzarella
- Silicone molds (skull-shaped)
- Olive oil (optional, for brushing)
- Salt (optional, for seasoning)
- Black olives (for decorating the eyes, optional)
Instructions
- Prepare your molds by preheating your refrigerator to ensure a cold setting for the mozzarella skulls after molding.
- Cut the fresh mozzarella into blocks or balls that fit snugly into your silicone molds.
- Mold the cheese by pressing the mozzarella into the skull molds, ensuring you fill them completely and create a defined shape.
- Season (optional) by brushing a light coating of olive oil over the mozzarella and sprinkle with salt to enhance the flavor.
- Add olive eyes by placing a small piece of black olive on each molded skull where the eyes should go.
- Chill to set by refrigerating the molds for about 30 minutes or until the mozzarella is firm to the touch.
- Unmold the skulls carefully from the molds.
- Serve & enjoy by arranging your mozzarella skulls on a charcuterie board or using them as toppings for salads.
Notes
Use fresh mozzarella for best flavor. Press cheese tightly into molds to ensure proper shape and texture.












