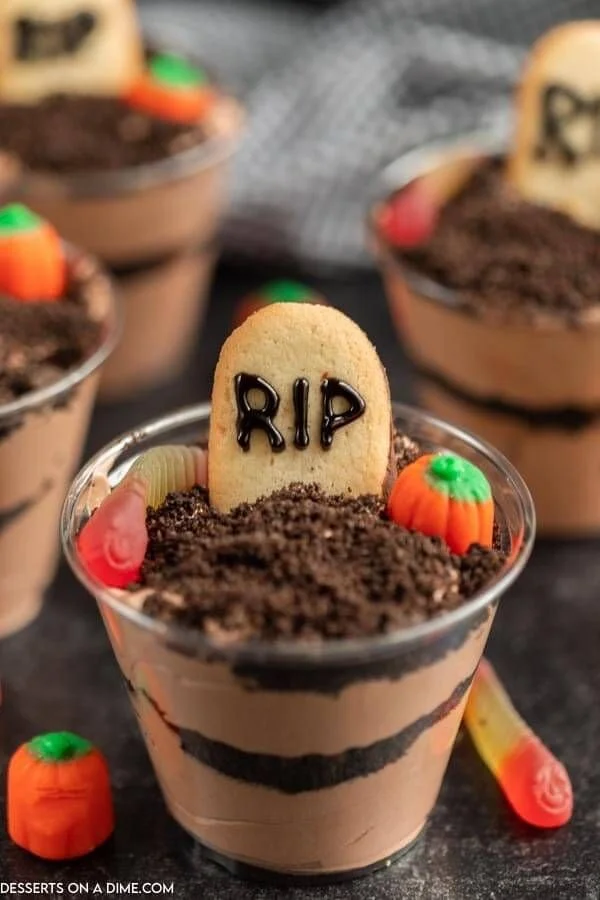
Halloween Dirt Cups are a fun and playful dessert perfect for any Halloween gathering. This easy recipe lets you create a spooky graveyard treat that’s not only delicious but also invites creativity in presentation. You can customize the decorations with fun toppings, making it an ideal project for families or kids’ parties.
Why You’ll Love Halloween Dirt Cups
- Fun and Festive: This dessert brings the Halloween spirit to your table. The chocolate pudding layered with crushed cookies creates a dirt-like effect, perfect for a graveyard theme.
- Simple to Make: With no baking required and a short list of ingredients, Halloween Dirt Cups are easy enough for beginners to whip up in no time.
- Visual Appeal: The creative presentation allows for lots of customization. You can add gummy worms, plastic spiders, or edible grave markers.
- Kid-Approved: Kids love helping with layering the ingredients and adorning their “graveyards” with assorted treats, making it a great family activity.
- Perfect for Parties: These cups can be made ahead of time and served at Halloween parties, school events, or neighborhood gatherings, ensuring that you have delicious treats ready to go.
Recipe Overview
- Prep Time: 20 minutes
- Cook Time: 0 minutes
- Total Time: 20 minutes (plus chilling time)
- Servings: 4-6
- Difficulty Level: Easy
Ingredients You’ll Need for Halloween Dirt Cups
- Chocolate Pudding: 2 cups (prepared, store-bought or homemade)
- Adds a rich, chocolatey base for the cups.
- Chocolate Sandwich Cookies: 1 cup (crushed)
- Gives the dirt-like texture and flavor.
- Whipped Topping: 1 cup (or homemade whipped cream)
- Provides a creamy contrast to the chocolate and cookies.
- Gummy Worms: for decoration
- Fun and colorful toppings that enhance the spooky theme.
- Plastic Grave Markers or Edible Decorations: optional
- These add a creative touch and make the dessert more thematic.
How to Make Halloween Dirt Cups
-
Prepare the Pudding
If you are making your own chocolate pudding, prepare it according to the recipe or package instructions and let it cool for a few minutes. -
Crush the Cookies
Place the chocolate sandwich cookies in a resealable plastic bag and crush them with a rolling pin until they achieve a fine crumb. You can also use a food processor for faster results. -
Layer the Ingredients
In clear cups or jars, start by adding a layer of chocolate pudding (about 1/4 cup). -
Add Cookie Crumbs
Sprinkle a layer of crushed sandwich cookies (approximately 2 tablespoons) over the pudding. Repeat these layers, finishing with a layer of cookie crumbs on top. -
Top with Whipped Cream
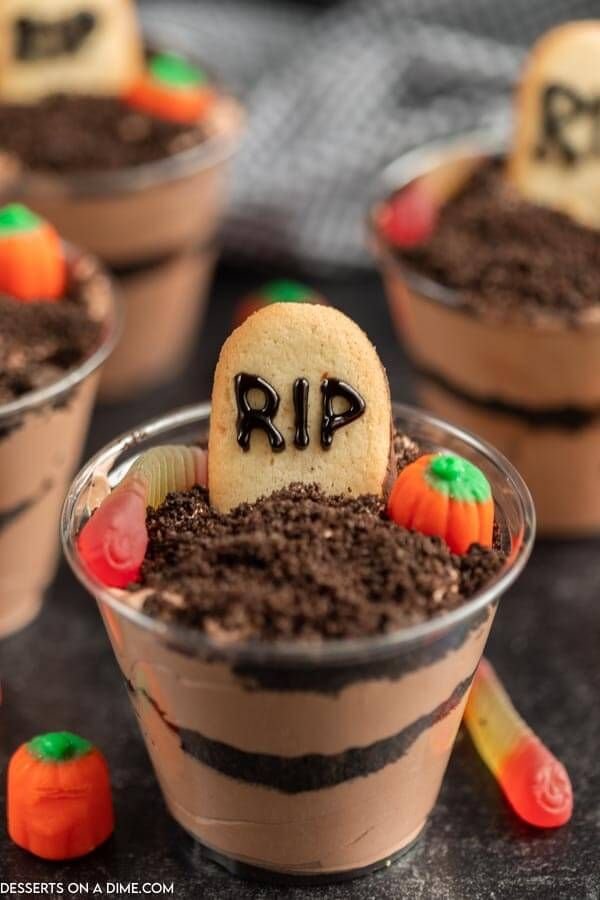
Add a dollop of whipped topping or homemade whipped cream on each cup. This will serve as the "grave soil" that holds your decorations. -
Decorate
Finally, insert gummy worms and any grave markers you have to create a spooky effect. You can be creative with how you layer these decorations. -
Chill
Place the cups in the refrigerator for at least 30 minutes to allow the flavors to meld and for a chilled treat.
Tips for Success
- Use Good Quality Pudding: Whether you choose to make your own or buy it, a rich chocolate pudding enhances the flavor.
- Crush Cookies Finely: The finer the cookie crumbs, the more realistic the “dirt” effect will appear.
- Chill Time Is Important: Allowing the dirt cups to chill not only sets the layers but also improves the overall flavor.
- Mix and Match Decorations: Feel free to include other spooky elements like chocolate sprinkles, candy pumpkins, or marshmallow ghosts for a personalized touch.
Easy Variations
- Switch Up the Flavor: Use vanilla pudding instead of chocolate for a lighter base, and sprinkle with crushed vanilla cookies.
- Add Fruit Layers: Incorporate layers of mashed strawberries or raspberries for an unexpected fruity bite and some color.
- Make It Gluten-Free: Use gluten-free sandwich cookies to accommodate dietary restrictions.
- Different Cookies: Change the cookies to include mint-flavored or peanut butter cookies for a different taste.
- Layer with Ice Cream: For an indulgent twist, add a scoop of ice cream in between pudding layers.
What to Serve with Halloween Dirt Cups
- Spider Sandwiches: Fun sandwiches cut into spider shapes that complement the spooky theme.
- Witch’s Brew Smoothies: A green smoothie that adds a healthy but spooky option to the dessert table.
- Pumpkin Spice Muffins: These seasonal treats enhance the fall vibe and are a great pairing with the chocolate cups.
- Monster Fruit Faces: Fun fruit displays with toothpick eyes that brighten up your dessert table.
- Ghostly Pizza: A savory option to balance out the sweet dirt cups, creating a complete meal.
Storage and Reheating
- Refrigerator Storage: Store the dirt cups in the fridge for up to 3 days. Ensure they are covered to prevent them from absorbing other flavors.
- Freezer Storage: It’s not recommended to freeze these cups as the texture may change.
- Best Reheating Method: Since this dessert is served cold, you don’t need to reheat it.
- Maintain Texture: Store the gummy worms separately until serving to prevent them from getting soggy.
Common Mistakes to Avoid
- Skipping the Chilling: Not chilling the cups will affect the flavor and layer integrity.
- Using Warm Pudding: Ensure your pudding is cool before layering; warm pudding can make the cookie layer mushy.
- Overworking the Cookie Crumbs: Crushing cookies too finely can make them too powdery; aim for a mix of fine and chunky pieces for better texture.
Halloween Dirt Cups: Background & Cultural Inspiration
Halloween Dirt Cups are often inspired by the playful spirit of traditional Halloween parties where treats are not just delicious but also visually entertaining. The idea of combining dirt (cookie crumbs) with layers of chocolate pudding reflects the fun of getting creative with food. Such desserts often encourage participation from children, turning dessert-making into a bonding activity. The spooky theme resonates with Halloween traditions worldwide, where the holiday is celebrated through creative costumes, decorations, and themed foods.
Frequently Asked Questions
Can I make Halloween Dirt Cups ahead of time?
Yes, you can prepare the cups a day in advance. Just store them in the refrigerator until you’re ready to serve.
What can I use instead of chocolate pudding?
You can use vanilla pudding or even a banana-flavored pudding for a different twist.
How do I store leftover dirt cups?
Keep any leftovers in an airtight container in the refrigerator for up to 3 days.
Can I add other toppings?
Absolutely! Consider using crushed candies, gummy eyeballs, or even edible glitter for a spooky touch.
Are there any alternatives for whipped topping?
You can use homemade whipped cream, coconut whipped cream, or even Greek yogurt for a healthier option.
Final Thoughts
Making Halloween Dirt Cups is not only an enjoyable experience but also a creative outlet for adults and children alike. This recipe is worth trying because it brings your Halloween gatherings to life with a delightful and spooky dessert. Whether you’re hosting a party or simply celebrating the season with family, these dirt cups are sure to be a hit. Enjoy the fun of decorating and indulging in this tasty treat!
PrintHalloween Dirt Cups

A fun and playful dessert perfect for Halloween gatherings, featuring layers of chocolate pudding, crushed cookies, and creative toppings.
- Prep Time: 20 minutes
- Cook Time: 0 minutes
- Total Time: 20 minutes
- Yield: 4-6 servings
- Category: Dessert
- Method: No Bake
- Cuisine: American
- Diet: Vegetarian
Ingredients
- 2 cups chocolate pudding (prepared, store-bought or homemade)
- 1 cup chocolate sandwich cookies (crushed)
- 1 cup whipped topping (or homemade whipped cream)
- Gummy worms (for decoration)
- Plastic grave markers or edible decorations (optional)
Instructions
- Prepare the pudding according to the recipe or package instructions and let it cool.
- Crush the cookies in a resealable plastic bag or food processor until fine crumbs.
- Layer chocolate pudding (about 1/4 cup) in clear cups or jars.
- Add a layer of crushed sandwich cookies (approximately 2 tablespoons) over the pudding. Repeat layers, finishing with cookie crumbs.
- Top with a dollop of whipped topping or homemade cream.
- Decorate with gummy worms and any grave markers for a spooky effect.
- Chill the cups in the refrigerator for at least 30 minutes before serving.
Notes
For best results, use good quality pudding and crush cookies finely for a realistic dirt effect.












