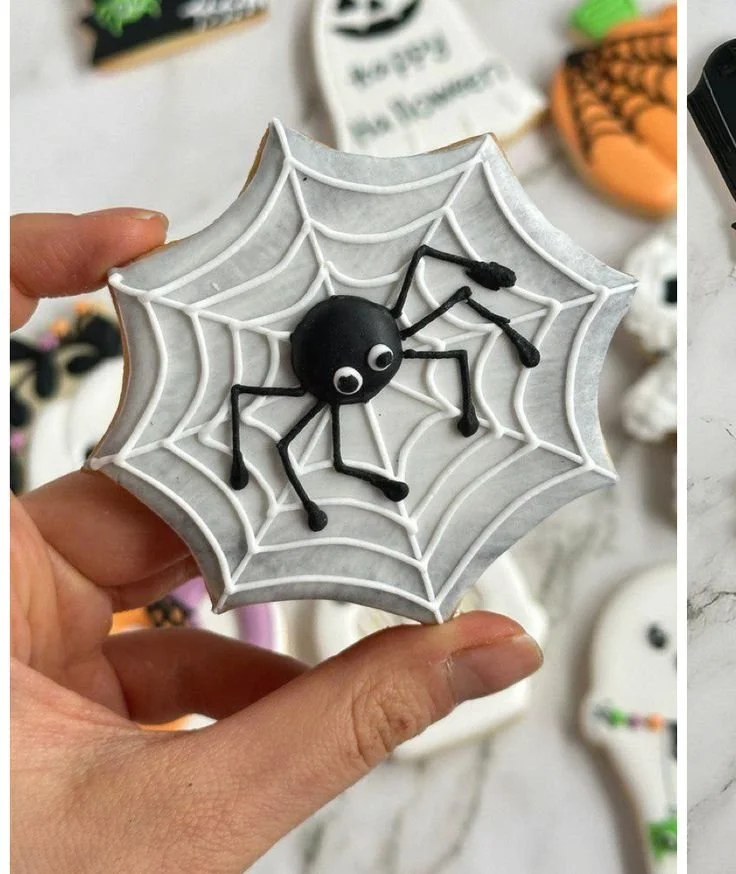
Halloween brings out the creativity in all of us, especially when it comes to decorating treats. This Spider Web Cookie Icing is perfect for adding a spooky touch to your Halloween cookies. It’s simple to make, and the result is both fun and festive, impressing both kids and adults alike. With this easy recipe, you can transform regular cookies into Halloween masterpieces!
Why You’ll Love Spider Web Cookie Icing
- Quick and Easy: This icing comes together in just a few minutes, making it perfect for busy holiday baking.
- Versatile Design: Use it to create spooky spider webs or other Halloween-themed decorations that are sure to delight.
- Kid-Friendly: It’s perfect for baking projects with kids, allowing them to express their creativity in the kitchen.
- Customizable: You can easily adjust the colors to match your Halloween theme or personal preference.
- Great for Batch Baking: Make a large batch of cookies and let everyone design their own. It’s a fun family activity!
Recipe Overview
- Prep Time: 10 minutes
- Total Time: 10 minutes
- Servings: Makes enough icing for 12-15 cookies
- Difficulty Level: Easy
Ingredients You’ll Need for Spider Web Cookie Icing
- 1 cup powdered sugar: This forms the base of the icing. Make sure it’s sifted for a smooth texture.
- 1-2 tablespoons milk: Adjust the amount to achieve the right consistency for piping.
- 1/2 teaspoon vanilla extract: Optional, for added flavor. You can use almond extract for a different taste.
- Black food coloring: For the classic spooky spider web look. Gel food coloring works best to avoid thinning the consistency.
- White food coloring (optional): If you want to add a white spider web over a colored base.
How to Make Spider Web Cookie Icing
-
Prepare the Icing Base
- In a mixing bowl, combine the powdered sugar and 1 tablespoon of milk. Stir until smooth. Add more milk as needed to achieve a thick, but pourable consistency.
-
Flavor It
- If using, stir in the vanilla extract for a hint of flavor. This step is optional but can elevate the taste.
-
Color the Icing
- Divide the icing into two small bowls. In one bowl, add black food coloring, mixing well until you reach your desired shade. If you’re planning to make white accents, keep the second bowl as is.
-
Fill the Piping Bags
- Pour the black icing into a piping bag. If you want to create a more intricate design, transfer some of the white icing into a separate piping bag as well.
-
Decorate the Cookies
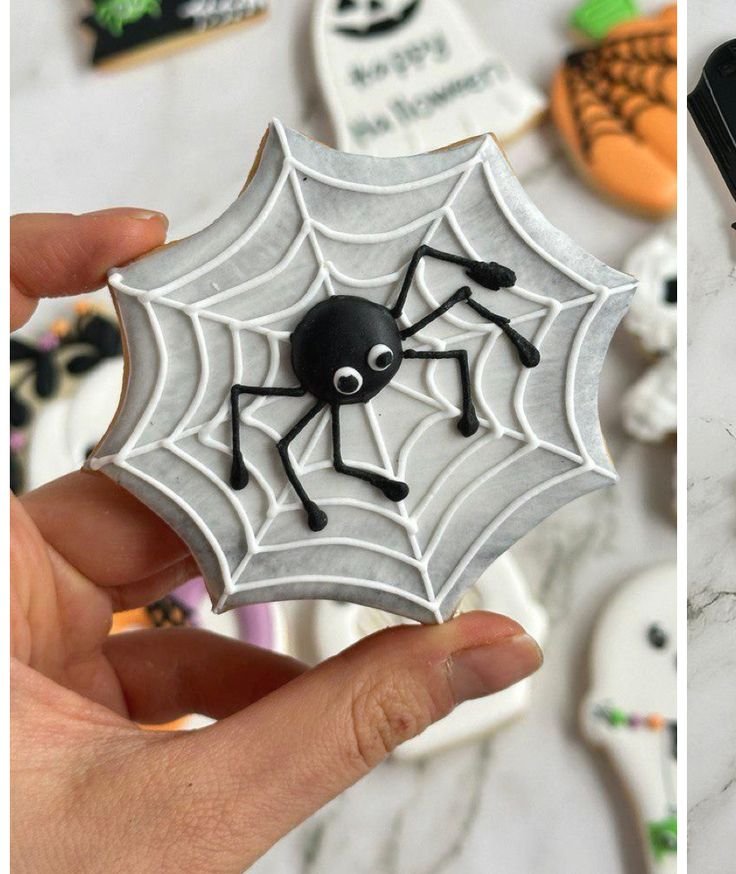
- Once the cookies have cooled completely, pipe a spiral starting from the center of the cookie outward with the black icing. Then, with the white icing, draw lines from the center of the spiral to the edge to create the spider web effect.
-
Let the Icing Set
- Allow the icing to dry completely before stacking or serving the cookies. This could take about 30 minutes to an hour.
Tips for Success
- Consistency Matters: The icing should be thick enough to hold its shape but thin enough to pipe smoothly. Test a small amount before decorating.
- Piping Techniques: If you’re new to piping, practice on parchment paper first to get a feel for the pressure needed.
- Let Cookies Cool: Ensure cookies are completely cool to prevent melting or smudging the icing.
- Storage: Store leftover icing in an airtight container for up to a week. You may need to stir in a bit more milk to revive it.
Easy Variations
- Color Theme: Use orange and purple food coloring for a classic Halloween look.
- Spider Accents: Add candy spiders or small decorations on top of the icing before it sets for an extra creepy effect.
- Flavor Twist: Experiment with different extracts, like lemon or mint, to change the flavor profile of the icing.
- Different Shapes: Instead of traditional round cookies, use Halloween-themed cutters like bats or pumpkins.
What to Serve with Spider Web Cookie Icing
- Halloween Sugar Cookies: These are the perfect base for your spider web icing and are a crowd favorite.
- Gingerbread Cookies: Their spiced flavor pairs wonderfully with the sweet icing.
- Brownies: Drizzle some icing on top of brownies for a festive touch!
- Milk: Always a classic pairing with baked goods, and a perfect treat for dunking!
Storage and Reheating
- Refrigerator Storage: Keep any leftover icing in an airtight container in the fridge for up to a week.
- Freezer Storage: Icing can also be frozen in an airtight container for up to a month. Thaw in the fridge and stir before use.
- Best Reheating Method: If the icing hardens, stir in a bit of milk to restore its original consistency.
Common Mistakes to Avoid
- Too Thin Icing: If the icing is too runny, add more powdered sugar until it thickens.
- Using Warm Cookies: Always make sure your cookies are completely cool to avoid melting the icing.
- Forgetting to Practice: If you’re new to piping, take a minute to practice your techniques on a plate before decorating your cookies.
Spider Web Cookie Icing: Background & Cultural Inspiration
The concept of icing cookies can be traced back centuries across various cultures, often tied to celebrations and holidays. Originating in ancient Europe, the art of creating intricate designs on baked goods has evolved dramatically. In modern times, Halloween has become a canvas for creativity, with icing allowing bakers to express their imaginations in the kitchen. This Spider Web Cookie Icing brings a fun and spooky touch to Halloween festivities, encouraging both kids and adults to get involved in the holiday spirit.
Frequently Asked Questions
Can I use this icing for other holidays?
Absolutely! You can customize the colors and designs to match any holiday theme.
How thick should the icing be for piping?
The icing should be thick enough to hold its shape but still smooth enough to easily pipe.
Can I make this icing ahead of time?
Yes, you can prepare the icing a few days in advance and store it in the fridge. Just stir in a little milk before using.
What if the icing dries too quickly?
If your icing dries out, simply add a teaspoon of milk to loosen it up before using.
Can I substitute different flavors?
Yes! You can use other extracts, but make sure they complement the sweet taste of the icing.
Final Thoughts
This Spider Web Cookie Icing is a simple yet delightful way to elevate your Halloween cookie decorating game. Whether you’re hosting a Halloween party or simply enjoying a fun activity with your family, this icing will help create lasting memories. Give it a try this season, and watch as your cookies come to life with spooky charm!
PrintSpider Web Cookie Icing
This Spider Web Cookie Icing is perfect for adding a spooky touch to your Halloween cookies. Simple to make, it’s great for decorating and impressing guests.
- Prep Time: 10 minutes
- Cook Time: 0 minutes
- Total Time: 10 minutes
- Yield: 12-15 cookies
- Category: Dessert
- Method: Piping
- Cuisine: American
- Diet: Vegetarian
Ingredients
- 1 cup powdered sugar (sifted)
- 1-2 tablespoons milk
- 1/2 teaspoon vanilla extract (optional)
- Black food coloring (gel preferred)
- White food coloring (optional)
Instructions
- In a mixing bowl, combine the powdered sugar and 1 tablespoon of milk. Stir until smooth. Add more milk as needed to achieve a thick, but pourable consistency.
- If using, stir in the vanilla extract for a hint of flavor.
- Divide the icing into two small bowls. In one bowl, add black food coloring, mixing well until you reach your desired shade.
- Pour the black icing into a piping bag and transfer some of the white icing into a separate piping bag.
- Once the cookies have cooled completely, pipe a spiral starting from the center of the cookie outward with the black icing, then use white icing to draw lines from the center to the edge to create the spider web effect.
- Allow the icing to dry completely before stacking or serving the cookies.
Notes
Make sure cookies are completely cool to prevent melting or smudging the icing. Store leftover icing in an airtight container for up to a week.












