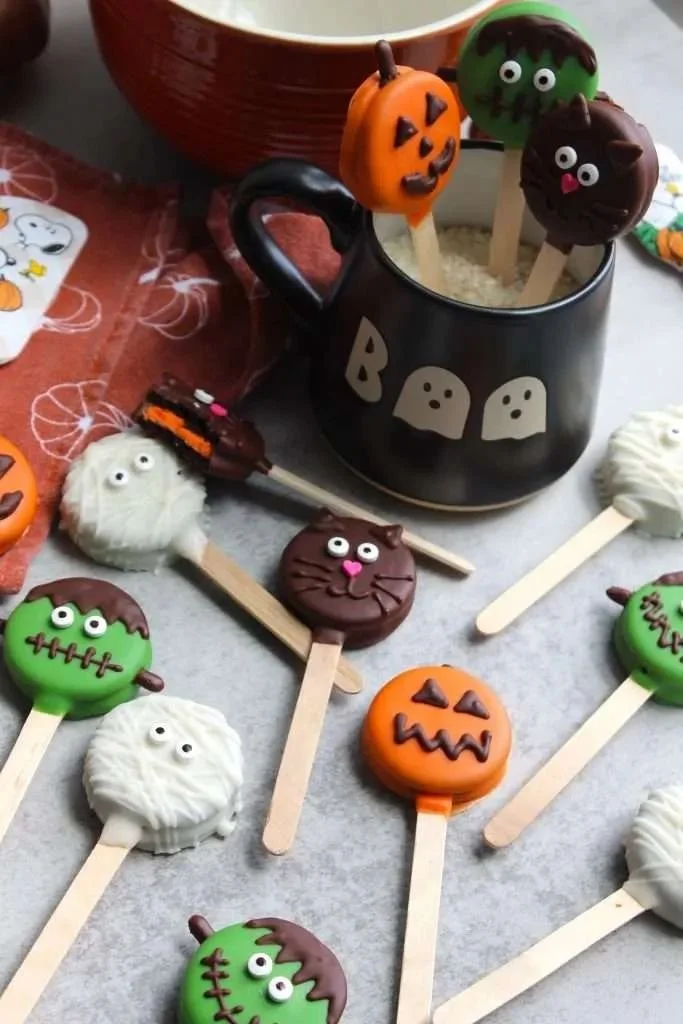
Halloween Oreo Pops are a fun and festive treat that brings a touch of whimsy to your holiday celebrations. With their chocolatey goodness and vibrant colors, these lollipop-style snacks are incredibly easy to make and perfect for parties, school events, or simply to enjoy at home. You’ll definitely want to whip up a batch this season!
Why You’ll Love Halloween Oreo Pops
- Easy to Make: This recipe involves just a few simple steps and really no baking, making it accessible for even novice cooks.
- Fun for All Ages: Kids will love to help in the kitchen! These pops are perfect for family bonding and getting everyone excited for Halloween.
- Customizable: Decorate with your favorite sprinkles and shapes, allowing for personal touches tailored to your taste or event theme.
- Perfect Treat for Any Occasion: These pops aren’t just for Halloween; they can be enjoyed at birthdays, holiday parties, or as simple snacks.
- No Special Equipment Needed: You don’t need fancy gadgets or bakeware – just a microwave, mixing bowl, and baking sheet.
- Great for Gift Giving: Package them up in fun bags and share with friends or neighbors as festive treats.
Recipe Overview
- Prep Time: 15 minutes
- Cook Time: 10 minutes
- Total Time: 25 minutes
- Servings: 12 pops
- Difficulty Level: Easy
Ingredients You’ll Need for Halloween Oreo Pops
- Oreo Cookies: 1 package, crushed to create the base for the pops.
- Candy Melts: 1 cup each of orange and black candy melts, used for coating the pops. You can substitute with white chocolate, if you prefer.
- Lollipop Sticks: 12 sticks to hold your Oreo pops.
- Sprinkles: For decoration, choose Halloween-themed sprinkles for a festive touch (think ghosts, bats, or pumpkins).
- Baking Sheet: A lined sheet for cooling the pops.
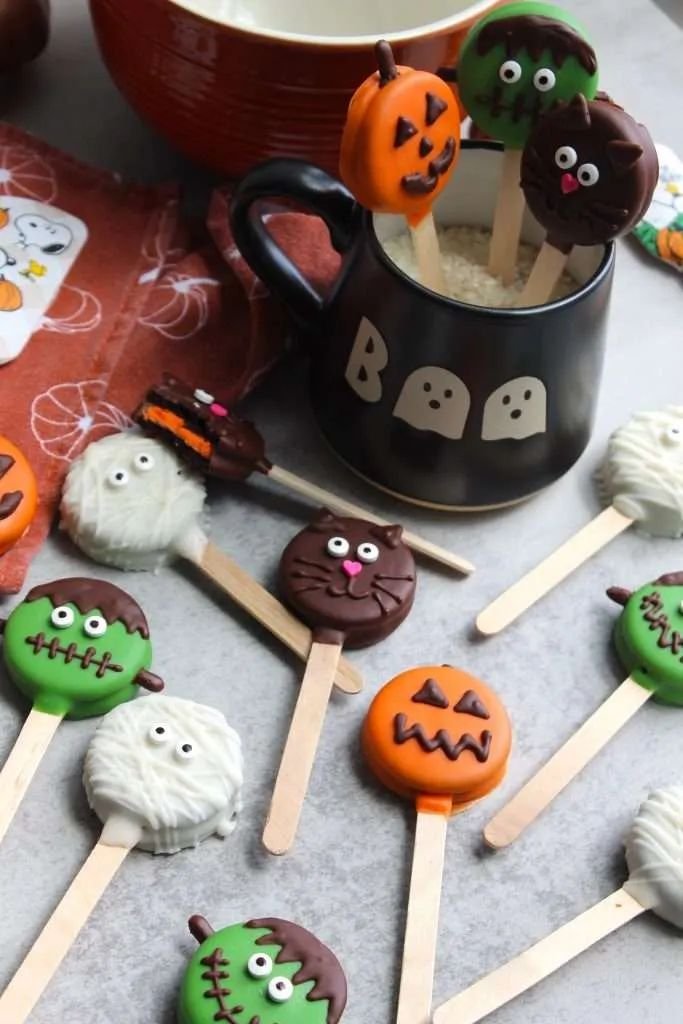
How to Make Halloween Oreo Pops
-
Crush the Oreo Cookies
Place the Oreo cookies in a bowl and crush them until they form fine crumbs. You can use a food processor or place them in a ziplock bag and crush them with a rolling pin. -
Melt the Candy Melts
Following the package instructions, melt the candy melts in the microwave. Heat in 30-second intervals, stirring in between until smooth and fully melted. -
Prepare the Lollipop Sticks
Dip each lollipop stick into the melted candy and insert it into the Oreo cookie crumbs, going halfway through. This ensures a secure hold while eating. -
Coat the Oreo Pops
Dip the Oreo pops into the melted candy, rolling them to ensure they are evenly coated. Allow any excess candy to drip back into the bowl. -
Chill the Pops
Place the coated Oreo pops on a baking sheet lined with parchment paper. -
Add Sprinkles
Before the candy hardens, sprinkle your Halloween decorations generously on top. -
Cool Completely
Let the pops cool until the candy coating hardens completely; this usually takes about 10-15 minutes at room temperature.
Tips for Success
- Melt Carefully: Be attentive when melting candy melts to avoid burning them; stir frequently for a smooth consistency.
- Get Creative: Experiment with different sprinkles and even shapes (like using cookie cutters to cut out Halloween figures).
- Set Properly: Ensure that the Oreo pops are spaced out on the baking sheet so they don’t stick together.
- Use Quality Ingredients: For the best flavor, choose fresh Oreo cookies and quality candy melts.
- Don’t Rush Cooling: Allow enough time for the coating to harden before serving to maintain texture and stability.
Easy Variations
- Chocolate Coating: Instead of orange and black candy melts, try using chocolate or white chocolate for a different flavor profile.
- Stuffed Oreos: For an indulgent twist, use flavored Oreos, like mint or peanut butter, for a unique taste.
- Nutty Pops: Add finely crushed nuts or coconut flakes to the candy coating for an extra crunch and flavor.
- Theme Pops: Adjust the colors and decorations for different occasions beyond Halloween, such as red and green for Christmas.
What to Serve with Halloween Oreo Pops
- Apple Slices: Crisp apple slices provide a fresh contrast to the sweetness of the pops.
- Hot Chocolate: A warm cup of hot chocolate can elevate the treat experience, especially on chilly evenings.
- Spooky Cheese Platter: Pair with a cheese platter featuring labeled cheeses and themed crackers to complement the fun.
- Pumpkin Spice Treats: Serve alongside pumpkin-inspired baked goods for a delightful seasonal spread.
Storage and Reheating
- Refrigerator Storage: Keep leftover Oreo pops in an airtight container in the refrigerator for up to a week.
- Freezer Storage: Yes! You can freeze the pops in a single layer on a baking sheet, then transfer them to a freezer-safe bag for up to a month.
- Best Reheating Method: It’s best enjoyed chilled or at room temperature. If pops become too soft, let them harden again in the refrigerator.
Common Mistakes to Avoid
- Overheating Candy: Avoid overheating the candy melts, as they can seize and become unusable.
- Skipping the Stick Dip: Remember to dip the sticks in melted candy before inserting into the cookies; this helps keep the pops from falling apart.
- Ignoring Cooling Time: Be patient and let the pops cool adequately to ensure that the coating sets properly before serving.
Halloween Oreo Pops: Background & Cultural Inspiration
Halloween Oreo Pops capture the spirit of celebration that defines Halloween festivities. They bridge the gap between playful fun and delicious treats, something that resonates with families around the world. The tradition of making fun, interactive foods during holidays encourages sharing and creativity. As families gather to prepare for Halloween, crafting these pops together helps create lasting memories, reflecting the joy of the season. This recipe symbolizes the playful side of Halloween, merging classic treats with a festive twist.
Frequently Asked Questions
Can I use different types of cookies?
Yes, you can use any cookie you like! Try double-stuffed Oreos for extra creaminess or even gluten-free cookies for a dietary option.
How long do these pops last?
Halloween Oreo Pops can last up to a week when stored properly in an airtight container in the refrigerator.
Can I make these ahead of time?
Absolutely! Halloween Oreo Pops can be made a day or two in advance and stored in the refrigerator until you’re ready to serve.
What if I can’t find candy melts?
If you can’t find candy melts, you can substitute with chocolate chips or melting wafers that can also be melted down.
How do I fix a lollipop stick that breaks?
If a stick breaks during handling, simply reinsert it into the pop or use a bit of melted candy to adhere it back together temporarily.
Final Thoughts
Halloween Oreo Pops are not only delicious, but they also offer a fantastic opportunity for creativity and fun in the kitchen. Their simplicity makes them a great project for families looking to make delicious memories this season. Whether you’re preparing for a party or just craving a sweet treat, these pops will delight everyone who tries them. Give this recipe a go, and enjoy the festivities!
PrintHalloween Oreo Pops

Fun and festive lollipop-style treats that bring a touch of whimsy to Halloween celebrations.
- Prep Time: 15
- Cook Time: 10
- Total Time: 25
- Yield: 12 pops
- Category: Dessert
- Method: No-Bake
- Cuisine: American
- Diet: Vegetarian
Ingredients
- 1 package Oreo Cookies, crushed
- 1 cup orange candy melts
- 1 cup black candy melts
- 12 lollipop sticks
- Halloween-themed sprinkles
- Baking sheet, lined
Instructions
- Crush the Oreo cookies in a bowl until they form fine crumbs.
- Melt the candy melts in the microwave using 30-second intervals, stirring until smooth.
- Prepare each lollipop stick by dipping it into the melted candy and inserting it into the Oreo crumbs halfway through.
- Coat the Oreo pops in the melted candy, rolling to ensure even coverage.
- Chill the coated pops on a baking sheet lined with parchment paper.
- Add sprinkles before the candy hardens.
- Cool completely until the candy coating hardens, about 10-15 minutes.
Notes
Make sure to avoid overheating the candy melts for best results. Experiment with different sprinkles and shapes for variety.












