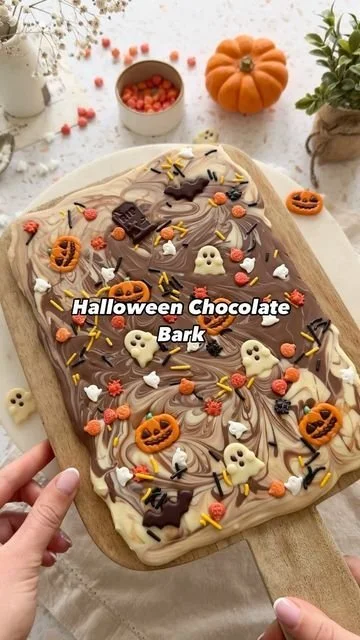
Chocolate bark is a delightful treat that’s perfect for fall festivities. Today, I’ll share a simple yet indulgent recipe for Fall Chocolate Bark. This colorful and seasonal candy is not only easy to make, but it’s also versatile enough to customize for various occasions. With a delightful mix of textures and flavors, it’s a treat that will bring a smile to anyone’s face.
Why You’ll Love Fall Chocolate Bark
- Easy to Make: With minimal steps and ingredients, you can whip up this treat in no time, making it perfect for last-minute gatherings.
- Customizable: Tailor the toppings to your taste or the occasion. From nuts to fruits, the possibilities are endless!
- Great for Sharing: Cut the bark into pieces and package them for gifts or bring them to parties. Everyone loves a homemade treat.
- Seasonal Flavors: Incorporate fall favorites like pumpkin spice or candy corn for a festive twist.
- No Baking Required: Simply melt, mix, and set—no oven needed! Ideal for novice bakers.
- Fun Activity: Get friends or family involved in choosing toppings or breaking the bark for a fun cooking experience.
Recipe Overview
- Prep Time: 15 minutes
- Cook Time: 10 minutes
- Total Time: 25 minutes
- Servings: 8-10 pieces
- Difficulty Level: Easy
Ingredients You’ll Need for Fall Chocolate Bark
- Chocolate: 12 ounces of high-quality semi-sweet or dark chocolate, chopped.
- Tip: Use chocolate chips for ease in melting.
- White Chocolate: 6 ounces, for drizzling or marbling.
- Toppings:
- 1/2 cup candy corn
- 1/2 cup crushed pretzels
- 1/4 cup roasted pumpkin seeds
- 1/4 cup dried cranberries
- Optional: sprinkles
- Note: Feel free to mix and match toppings based on your preferences!
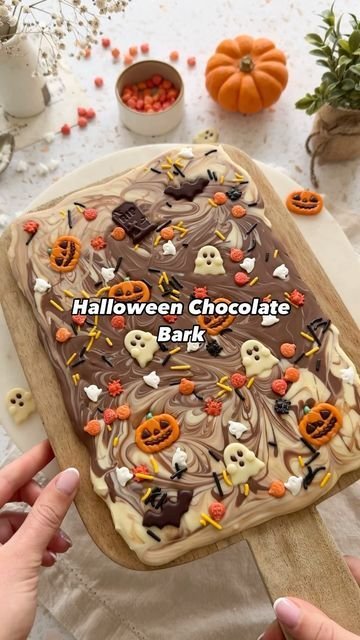
How to Make Fall Chocolate Bark
-
Prepare the Baking Sheet
- Line a baking sheet with parchment paper, ensuring it’s spread evenly. This will help the bark release easily once set.
-
Melt the Chocolate
- In a microwave-safe bowl, add the chopped semi-sweet or dark chocolate. Heat in the microwave in 30-second intervals, stirring in between, until fully melted and smooth.
-
Pour and Spread
- Pour the melted chocolate onto the prepared baking sheet. Using a spatula, spread it into an even layer, about 1/4 inch thick.
-
Add Toppings
- While the chocolate is still warm, sprinkle the candy corn, crushed pretzels, pumpkin seeds, and dried cranberries over the surface. Press down lightly to ensure they adhere.
-
Drizzle White Chocolate
- In a separate bowl, melt the white chocolate using the same method as the dark chocolate. Drizzle it over the bark in a zigzag pattern for added decoration.
-
Let It Set
- Allow the bark to cool at room temperature for about 15 minutes, then transfer it to the refrigerator for another 30 minutes to fully set.
-
Break into Pieces
- Once set, remove the bark from the parchment and break it into bite-sized pieces. Store in an airtight container.
Tips for Success
- Use a sharp knife to chop the chocolate evenly, ensuring it melts smoothly.
- Do not overheat the chocolate; stir gently until just melted to avoid burning.
- Experiment with toppings, but don’t overload—too many can make it difficult to break into pieces.
- Allow the bark to cool completely at room temperature for the best texture.
- Ensure that all ingredients are dry before adding them to the melted chocolate.
Easy Variations
- Nutty Delight: Add a mix of chopped nuts like almonds or pecans for a crunchy texture.
- Fruit Fusion: Swap dried cranberries for dried apricots or cherries for a fruity twist.
- Spiced Version: Mix in a teaspoon of pumpkin spice with the melted chocolate for a cozy autumn flavor.
- Salted Caramel: Drizzle caramel sauce over the bark and sprinkle with sea salt before it sets for a sweet-salty contrast.
- Candy Bar Remix: Add crushed pieces of your favorite candy bars for unique flavor combinations.
What to Serve with Fall Chocolate Bark
- Hot Chocolate: A cup of warm, rich hot chocolate is the perfect pairing for this sweet treat.
- Coffee or Tea: Enjoy with a cozy mug of coffee or tea for a delightful afternoon snack.
- Ice Cream: Serve pieces of chocolate bark over vanilla or pumpkin ice cream for a decadent dessert.
- Cheese Board: Add to a charcuterie board for an interesting sweet-and-salty combination with cheeses and meats.
Storage and Reheating
- Refrigerator Storage: Keep the chocolate bark in an airtight container for up to two weeks.
- Freezer Storage: You can also freeze the bark for up to two months. Wrap it well to avoid freezer burn.
- Best Reheating Method: If the bark softens, let it sit at room temperature to regain its firmness rather than reheating.
- Preserve Texture: Storing in a cool, dry place will help maintain its snap.
Common Mistakes to Avoid
- Skipping the Parchment: Not using parchment paper can lead to sticking issues; always line your baking sheet.
- Heating Too Quickly: Melting chocolate too quickly can cause it to seize. Use low power settings and stir frequently.
- Overloading Toppings: Adding too many toppings can make the bark difficult to break and less enjoyable to eat.
- Not Letting It Set: Cutting into the bark before it fully sets will result in a messy treat. Be patient and let it cool completely.
- Using Low-Quality Chocolate: Low-quality chocolate can affect flavor and texture. Use good quality chocolate for the best results.
Fall Chocolate Bark: Background & Cultural Inspiration
Chocolate bark, with its roots deeply embedded in various cultures, often celebrates seasonal themes and festive gatherings. In many countries, chocolate serves as a medium for artisans to showcase their favorite flavors and textures. The addition of seasonal toppings like nuts and dried fruits allows for a creative expression that reflects the bounty of each harvest season. This recipe draws inspiration from the traditional chocolate bark often made during festive occasions, transforming it into an autumn delight that encapsulates the flavors of fall.
Frequently Asked Questions
Can I use white chocolate instead of dark chocolate?
Yes! Feel free to use only white chocolate for a different flavor. Just be aware that the set will be sweeter.
How long can the chocolate bark be stored?
The bark can be stored in an airtight container for up to two weeks at room temperature, or longer if frozen.
Can I make the bark ahead of time?
Absolutely! This treat is perfect for meal prep. Prepare it a few days in advance and store it until serving.
What if my chocolate seizes when melting?
If your chocolate seizes, it can be rescued by adding a teaspoon of vegetable oil or coconut oil and stirring until smooth.
Can I customize my toppings?
Definitely! Use any toppings you love—just make sure they are dry and don’t add too much moisture to the chocolate.
Final Thoughts
Fall Chocolate Bark is a simple and satisfying treat that captures the essence of autumn with its delightful mix of flavors and textures. It’s perfect for sharing with friends and family or as a festive gift. With easy preparation and countless variations, this recipe is a must-try this season. Embrace the season by making your own batch, and enjoy the smiles it brings!
PrintFall Chocolate Bark

A simple, customizable treat perfect for fall celebrations, featuring a delightful mix of chocolate and seasonal toppings.
- Prep Time: 15
- Cook Time: 10
- Total Time: 25
- Yield: 8-10 pieces
- Category: Dessert
- Method: No Bake
- Cuisine: American
- Diet: Vegetarian
Ingredients
- 12 ounces high-quality semi-sweet or dark chocolate, chopped
- 6 ounces white chocolate, for drizzling or marbling
- 1/2 cup candy corn
- 1/2 cup crushed pretzels
- 1/4 cup roasted pumpkin seeds
- 1/4 cup dried cranberries
- Optional: sprinkles
Instructions
- Prepare the baking sheet by lining it with parchment paper.
- Melt the chocolate in a microwave-safe bowl, heating in 30-second intervals.
- Pour the melted chocolate onto the prepared baking sheet and spread it into an even layer.
- Add the candy corn, pretzels, pumpkin seeds, and cranberries on top of the melted chocolate.
- Drizzle the melted white chocolate over the composition.
- Let the bark cool at room temperature for 15 minutes before refrigerating for 30 minutes.
- Break into bite-sized pieces once set and store in an airtight container.
Notes
You can customize the toppings to your liking. Ensure all toppings are dry before adding them.












