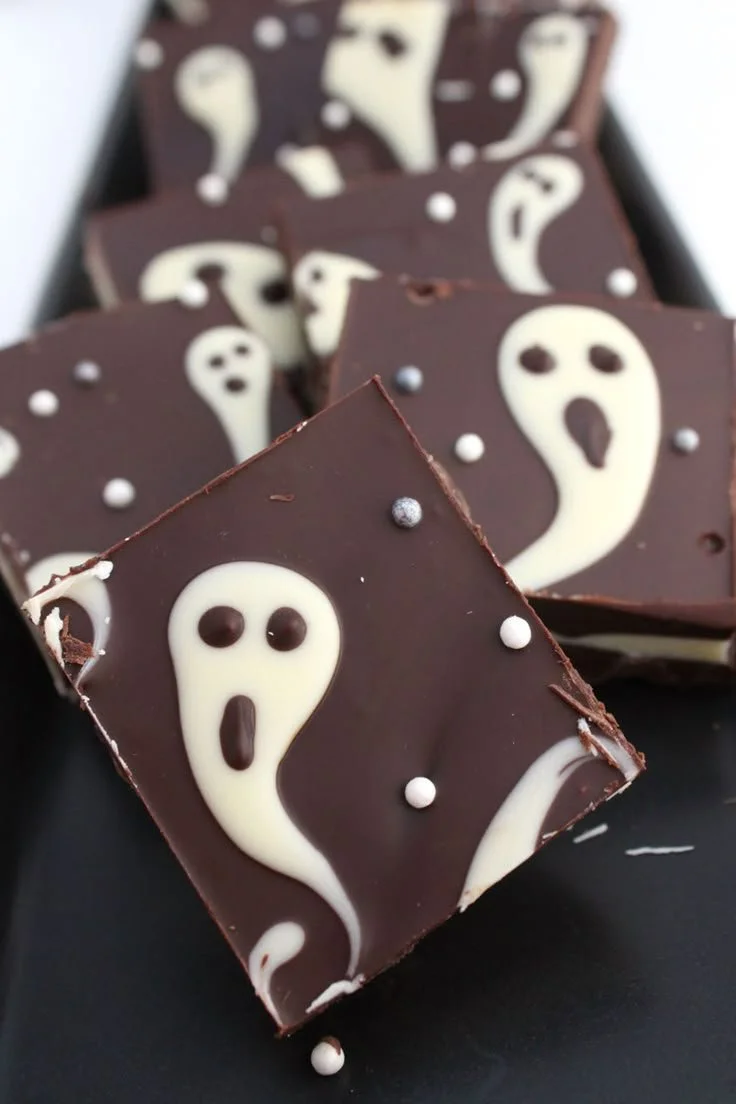
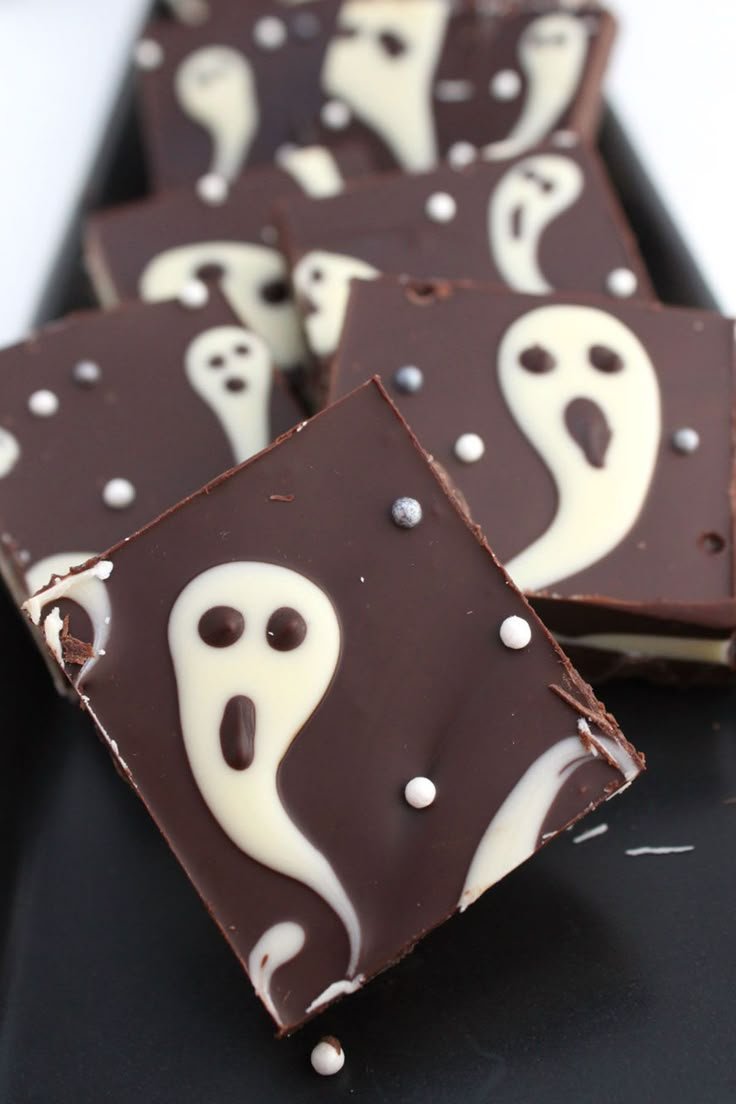
The Halloween Chocolate Bark is a delightful treat that will add some spooky sweetness to your festivities. It combines the richness of dark chocolate with the creaminess of white chocolate, plus an assortment of fun candies and sprinkles. This recipe not only looks fabulous but is also incredibly easy to make, making it perfect for beginner home cooks looking to create a festive dessert.
Why You’ll Love Halloween Chocolate Bark
- Quick and Easy: This recipe requires no baking, and the entire process can be completed in about an hour, making it perfect for last-minute treats.
- Customizable: You can use any assortment of candies and sprinkles, personalizing the bark to fit your taste or theme.
- Fun for Kids: Involve the little ones in the process by having them choose the candies and help with the decorating.
- Visually Stunning: The combination of dark and white chocolate with colorful toppings makes for an eye-catching dessert that’s sure to impress.
- Great for Parties: Whether it’s a Halloween gathering or a fall celebration, this bark is a hit for both kids and adults alike.
Recipe Overview
- Prep Time: 20 minutes
- Cook Time: 10 minutes
- Total Time: 30 minutes (plus refrigeration)
- Servings: about 16 pieces
- Difficulty Level: Easy
Ingredients You’ll Need for Halloween Chocolate Bark
- 8 oz dark chocolate
- 4 oz white chocolate
- 1 cup assorted candies (like gummy worms, candy eyeballs, etc.)
- Sprinkles
Ingredient Notes
- Dark Chocolate: Use high-quality chocolate for the best flavor and texture. Bittersweet or semi-sweet varieties work well.
- White Chocolate: Look for good-quality white chocolate chips or bars, as they melt smoothly.
- Candies: Feel free to switch up the candies based on your preferences or seasonal availability.
How to Make Halloween Chocolate Bark
- Prepare the Baking Sheet: Line a baking sheet with parchment paper, ensuring the paper hangs over the edges for easy removal later.
- Melt the Dark Chocolate: Break the dark chocolate into pieces and place them in a microwave-safe bowl. Heat in the microwave in 30-second intervals, stirring in between until melted and smooth.
- Spread Dark Chocolate: Pour the melted dark chocolate onto the prepared baking sheet. Use a spatula to spread it into an even layer, approximately 1/4 inch thick.
- Melt the White Chocolate: In a separate microwave-safe bowl, melt the white chocolate following the same method as the dark chocolate until smooth.
- Drizzle White Chocolate: Once melted, drizzle the white chocolate over the dark chocolate layer in a random pattern to create a marbled look.
- Swirl the Chocolates: Take a knife or a skewer and gently swirl the chocolates together to create a design.
- Add Toppings: Immediately sprinkle the assorted candies and sprinkles on top before the chocolate begins to set.
- Refrigerate: Place the baking sheet in the refrigerator for about 30 minutes or until the chocolate is firm.
- Break into Pieces: Once set, break the chocolate bark into irregular pieces and serve.
Tips for Success
- Melt Slowly: Avoid overheating the chocolate by melting it gradually and stirring frequently.
- Even Layer: Ensure the chocolate layer is even for uniform thickness and easier breaking.
- Use Room Temperature Ingredients: If using chocolate chips instead of bars, keep them at room temperature to help them melt smoothly.
- Don’t Overcrowd: Be mindful of how many candies you add on top to prevent them from overwhelming the chocolate.
Easy Variations
- Nutty Delight: Incorporate chopped nuts like almonds or pecans for added crunch.
- Spicy Kick: Add a sprinkle of sea salt or a dash of cayenne pepper for a sweet-spicy flavor twist.
- Dried Fruit: Substitute candies with dried fruits like cranberries or apricots for a chewy texture.
- Festive Theme: Use candies that match specific holidays or special occasions to change the bark’s appearance.
What to Serve with Halloween Chocolate Bark
- Hot Chocolate: This chocolate bark pairs perfectly with a warm cup of hot chocolate for a cozy dessert.
- Halloween Cookies: Offer ghost-shaped or pumpkin cookies alongside for a delightful treat spread.
- Fruit: Fresh fruit, like apple slices or strawberries, brings a refreshing contrast to the sweet chocolate.
- Ice Cream: Serve it with vanilla or chocolate ice cream for an indulgent dessert combo.
Storage and Reheating
- Refrigerator Storage: Store the chocolate bark in an airtight container in the refrigerator for up to 2 weeks.
- Freezer Storage: You can also freeze the bark in an airtight container for up to 3 months. Allow it to thaw at room temperature before serving.
- Keep Texture: To maintain its crisp texture, avoid storing the bark in a humid environment.
Common Mistakes to Avoid
- Overheating Chocolate: Keep an eye on the chocolate while melting. Overheating can cause it to seize or become grainy.
- Not Mixing Fast Enough: Swirl the chocolates together quickly before they set; otherwise, they won’t blend well.
- Too Much Topping: Adding too many candies may make it difficult to break the bark into pieces.
Halloween Chocolate Bark: Background & Cultural Inspiration
Chocolate bark has a storied history, tracing its origins to candy-making traditions that date back centuries. It was likely influenced by both European confections and indigenous practices of using cacao. The custom of creating decorative and colorful candy bark around holidays like Halloween or Christmas has become widely popular, bringing together families and friends in the kitchen to create festive treats. The playful nature of this dessert, with its customizable toppings, embodies the spirit of holiday celebrations, where creativity meets deliciousness.
Frequently Asked Questions
Can I use milk chocolate instead of dark chocolate?
Yes, milk chocolate can be used, but it will change the flavor profile, making it sweeter.
How long can I store the chocolate bark?
You can store chocolate bark in an airtight container in the refrigerator for up to 2 weeks or freeze for up to 3 months.
Can I add other flavors to the chocolate?
Certainly! Flavor extracts like vanilla, peppermint, or orange add a fun twist to your bark.
Is this a good make-ahead dessert?
Yes, Halloween Chocolate Bark can be prepared a few days in advance, making it ideal for parties or gatherings.
What do I do if my chocolate seizes?
If your chocolate seizes, try adding a small amount of vegetable oil or cocoa butter and gently reheat until smooth.
Final Thoughts
Making Halloween Chocolate Bark is a fun and simple way to celebrate the season. With its vibrant colors and delicious flavors, it’s a treat that everyone will love. Plus, the ease of preparation makes it a perfect project for both seasoned cooks and beginners alike. So gather your ingredients, invite the kids in for some kitchen fun, and enjoy the sweet rewards of your deliciously spooky creation!
PrintHalloween Chocolate Bark
A delightful treat combining dark and white chocolate with assorted candies and sprinkles, perfect for Halloween festivities.
- Prep Time: 20 minutes
- Cook Time: 10 minutes
- Total Time: 30 minutes
- Yield: 16 pieces
- Category: Dessert
- Method: No-Bake
- Cuisine: American
- Diet: Vegetarian
Ingredients
- 8 oz dark chocolate
- 4 oz white chocolate
- 1 cup assorted candies (like gummy worms, candy eyeballs, etc.)
- Sprinkles
Instructions
- Prepare the baking sheet: Line a baking sheet with parchment paper, ensuring the paper hangs over the edges for easy removal later.
- Melt the dark chocolate: Break the dark chocolate into pieces and place them in a microwave-safe bowl. Heat in the microwave in 30-second intervals, stirring in between until melted and smooth.
- Spread dark chocolate: Pour the melted dark chocolate onto the prepared baking sheet. Use a spatula to spread it into an even layer, approximately 1/4 inch thick.
- Melt the white chocolate: In a separate microwave-safe bowl, melt the white chocolate following the same method as the dark chocolate until smooth.
- Drizzle white chocolate: Once melted, drizzle the white chocolate over the dark chocolate layer in a random pattern to create a marbled look.
- Swirl the chocolates: Take a knife or a skewer and gently swirl the chocolates together to create a design.
- Add toppings: Immediately sprinkle the assorted candies and sprinkles on top before the chocolate begins to set.
- Refrigerate: Place the baking sheet in the refrigerator for about 30 minutes or until the chocolate is firm.
- Break into pieces: Once set, break the chocolate bark into irregular pieces and serve.
Notes
Melt chocolate slowly to avoid overheating, and be mindful of how many toppings you add to prevent overcrowding the bark.












