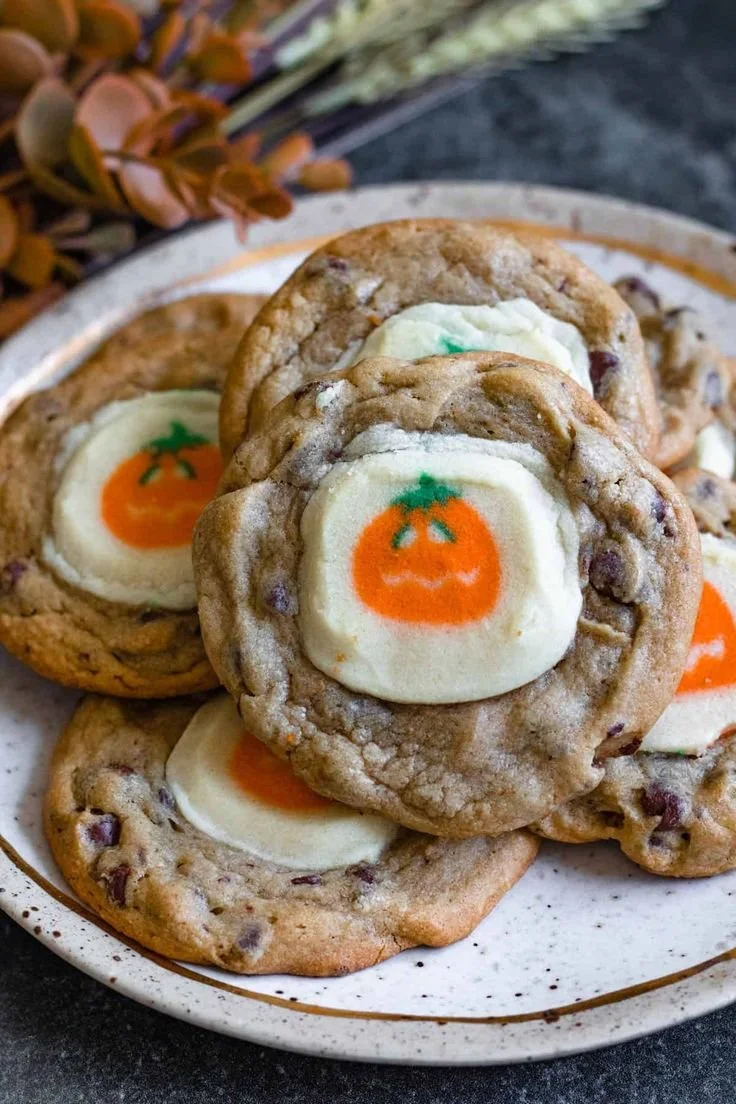
Making Spooky Halloween Cookies is a fun and festive way to celebrate the Halloween season! These vibrant, decorated cookies are perfect for gatherings, parties, or simply to enjoy with family. They’re easy to whip up using Pillsbury cookie dough, making them a great choice for beginner bakers looking to add a special treat to their celebration.
Why You’ll Love Spooky Halloween Cookies
- Effortless Preparation: With just a few ingredients and minimal time, these cookies come together quickly, making them perfect for busy schedules.
- Fun for All Ages: Decorating cookies can be a delightful activity for kids and adults alike, encouraging creativity and hands-on fun.
- Perfect for Parties: These colorful cookies are sure to be a hit at any Halloween gathering, adding festive flair to your dessert table.
- Customizable Designs: With Halloween-themed cookie cutters and sprinkles, you have the freedom to create various shapes and designs, making each cookie unique.
- Minimal Ingredients: You only need a few pantry staples, keeping it simple and budget-friendly.
Recipe Overview
- Prep Time: 15 minutes
- Cook Time: 10-12 minutes
- Total Time: 25-27 minutes
- Servings: About 24 cookies
- Difficulty Level: Easy
Ingredients You’ll Need for Spooky Halloween Cookies
- Pillsbury Cookie Dough: The base for your cookies; choose your favorite flavor. It saves time and ensures consistent taste.
- Halloween-Themed Sprinkles: These add festive flair and fun colors to your cookies. Look for different shapes like ghosts, pumpkins, or bats.
- Halloween Cookie Cutters: Essential for creating spooky shapes. Use various cutters to mix up your designs.
- Optional: Frosting: Feel free to use store-bought or homemade frosting for an extra layer of sweetness and to help sprinkles stick.

here
How to Make Spooky Halloween Cookies
-
Preheat the Oven
Preheat your oven according to the cookie dough package instructions. This step ensures that your cookies bake evenly. -
Roll Out Dough
On a lightly floured surface, roll out the Pillsbury cookie dough to about 1/4 inch thickness. Aim for an even layer to get uniform cookies. -
Cut Shapes
Use your Halloween-themed cookie cutters to cut out fun shapes. Dip the cutter into flour to prevent sticking. -
Prepare Baking Sheet
Place the cookie shapes on a baking sheet lined with parchment paper. Give them some space to spread while baking. -
Bake the Cookies
Bake according to the package directions. Keep an eye on them – they should be lightly golden around the edges when done. -
Cool the Cookies
Once baked, allow the cookies to cool on the baking sheet for a few minutes before transferring them to a wire rack to cool completely. -
Decorate
Once the cookies are completely cool, decorate them with frosting and sprinkle on your Halloween-themed sprinkles. Get creative with different designs! -
Enjoy!
Serve your spooky cookies at your Halloween gathering or enjoy them yourself!
Tips for Success
- Chill the Dough: If the dough is too soft or sticky to roll out, chill it in the refrigerator for 20-30 minutes.
- Watch the Baking Time: Check your cookies a minute or two early; ovens may vary, and you don’t want them overbaked.
- Use a Thin Layer of Frosting: A thin layer helps the sprinkles stick without overwhelming the cookie’s flavor.
- Keep Shapes Consistent: For even baking, ensure all cookie shapes are similar in thickness.
- Avoid Overcrowding: Give the cookies enough space on the baking sheet to spread out without touching.
Easy Variations
- Chocolate Chip Spooky Cookies: Mix in chocolate chips into the cookie dough for a sweet surprise.
- Frosting Flavors: Experiment with different frosting flavors such as vanilla, chocolate, or even orange zest for a citrus twist.
- Add Extracts: A splash of almond or vanilla extract can enhance the flavor of the cookie dough.
- Sprinkle Alternatives: If Halloween sprinkles are not available, use seasonal colors like orange, purple, and black for a festive touch.
- Nutty Crunch: Add chopped nuts to the dough for added texture and flavor.
What to Serve with Spooky Halloween Cookies
- Milk: A classic pairing that complements the sweetness of cookies.
- Hot Cocoa: This warm drink creates a cozy setting, especially for Halloween festivities.
- Seasonal Fruits: Apples or pears, perhaps served with a sprinkle of cinnamon, can provide a refreshing contrast.
- Halloween-Themed Cupcakes: Create a well-rounded dessert table with additional sweet options.
- Caramel Dipping Sauce: Serve cookies with a side for an indulgent treat.
Storage and Reheating
- Refrigerator Storage: Store leftover cookies in an airtight container in the fridge for up to a week.
- Freezer Storage: You can freeze undecorated cookies for up to three months. Just make sure they are completely cooled before wrapping.
- Reheating: To preserve texture, eat cookies at room temperature or warm them slightly in the microwave for 5-10 seconds.
- Meal Prep Note: Consider making the cookie dough ahead of time and chilling it until ready to bake.
Common Mistakes to Avoid
- Underbaking: Always bake until the cookies are slightly golden; you can assess doneness by touch.
- Ignoring Cooling Time: Allow cookies to cool completely before decorating to prevent the frosting from melting.
- Tool Misuse: Using a dull cookie cutter can lead to ragged edges; ensure your tools are clean and sharp.
- Overloading on Sprinkles: Too many toppings can overpower the cookie flavor; sprinkle them sparingly.
- Neglecting Oven Calibration: Always verify your oven’s temperature accuracy; an oven thermometer can help.
Spooky Halloween Cookies: Background & Cultural Inspiration
Halloween cookies have become a beloved tradition, emerging from the ancient practice of celebrating the harvest season. The act of decorating cookies reflects the festive and playful spirit of Halloween, often shared during gatherings or as treats for trick-or-treaters. The colorful decorations symbolize the colors of fall, with a nod to spooky themes that are part of Halloween lore. Using cookie cutters adds a personal and creative touch, drawing inspiration from the imaginative world of Halloween characters and motifs. This fun and easy recipe allows everyone to join in on the spooky spirit of the holiday.
Frequently Asked Questions
Can I make the dough ahead of time?
Yes, you can prepare the dough and chill it in the refrigerator for up to 3 days before rolling and baking.
What can I use instead of frosting?
You can use melted chocolate, yogurt, or even a simple dusting of powdered sugar if you prefer a lighter topping.
How long will the cookies stay fresh?
When stored properly in an airtight container, cookies can stay fresh for about a week.
Can I freeze decorated cookies?
It’s best to freeze undecorated cookies. Decorated cookies may not hold up as well due to the frosting.
What if I don’t have Halloween-themed cookie cutters?
Feel free to use any cookie cutters you have on hand; circles, stars, or even fruit shapes work just as well.
Final Thoughts
Spooky Halloween Cookies are not only a treat for the taste buds but also a delightful way to embrace the Halloween spirit. With their ease of preparation and fun decorating opportunities, they are sure to bring joy and creativity into your kitchen. Whether you’re hosting a party or just looking to celebrate the season, these cookies are worth trying out! Happy baking!
PrintSpooky Halloween Cookies
A fun and festive way to celebrate Halloween with vibrant, decorated cookies that are easy to make and perfect for gatherings.
- Prep Time: 15 minutes
- Cook Time: 12 minutes
- Total Time: 27 minutes
- Yield: 24 cookies
- Category: Dessert
- Method: Baking
- Cuisine: American
- Diet: Vegetarian
Ingredients
- 1 package Pillsbury Cookie Dough
- Halloween-themed sprinkles
- Halloween cookie cutters
- Optional: Frosting
Instructions
- Preheat the oven according to the cookie dough package instructions.
- Roll out the Pillsbury cookie dough to about 1/4 inch thickness on a lightly floured surface.
- Cut shapes using Halloween-themed cookie cutters.
- Prepare a baking sheet lined with parchment paper and place the cookie shapes on it.
- Bake according to package directions until lightly golden around the edges.
- Cool the cookies on the baking sheet for a few minutes before transferring to a wire rack.
- Decorate the completely cooled cookies with frosting and Halloween sprinkles.
- Enjoy! Serve at your Halloween gathering or enjoy yourself!
Notes
Chill the dough if it’s too soft, watch baking time closely, and use a thin layer of frosting for better sprinkle adhesion.












